Working with Disk and File System in Linux
After knowing how the Linux Kernel presents devices to userspace. Now its time to look at how we can partition disks, create and maintain filesystems that goes inside disk partitions, and work with the swap space.
Partitioning Disk Devices
- Partitons are the subdivisons of the whole disk
- Partitions are defined on a small area of the disk called partition table
- Two types of partition tables: Master Boot Record (MBR) and GUID Parttion Table (GPT)
- Linux Partitioning tools:
parted,gparted,fdisk,gdisk
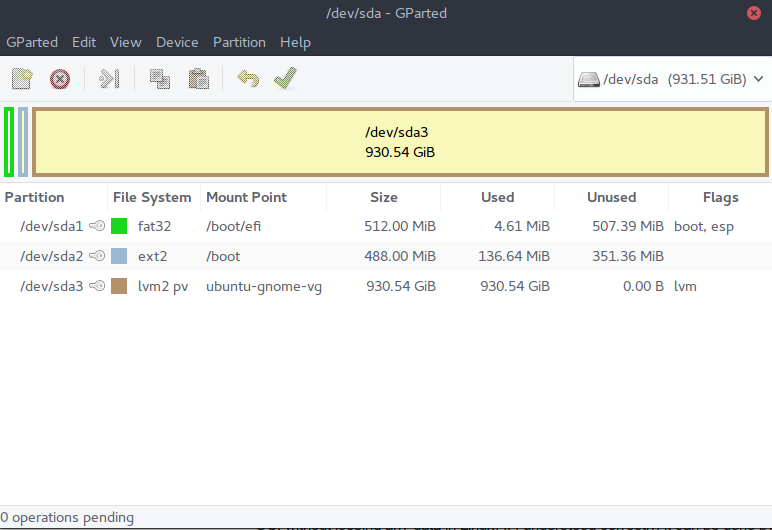
Viewing Partition Table
1
2
3
4
5
$ sudo parted -l
# OR
$ fdisk -l
# OR
$ lsblk
1
2
3
4
5
6
7
8
9
10
11
12
13
14
15
16
17
18
19
20
# Output of 'parted -l'
Model: ATA Samsung SSD 870 EVO 1TB (scsi)
Disk /dev/sda: 1000GB
Sector size (logical/physical): 512B/512B
Partition Table: gpt
Disk Flags:

Number  Start   End     Size    File system     Name     Flags
 1      1049kB  538MB   537MB   fat32           EFI      boot, esp
 2      538MB   4295MB  3757MB  ext4
 3      4295MB  1000GB  996GB   ext4

Model: WD My Passport 0820 (scsi)
Disk /dev/sdb: 2000GB
Sector size (logical/physical): 512B/512B
Partition Table: msdos
Disk Flags:

Number  Start   End     Size    Type      File system  Flags
 1      1049kB  2000GB  2000GB  primary   ntfs         lba
1
2
3
4
5
6
7
8
9
10
11
12
# Output of fdisk -l
sudo fdisk -l
Disk /dev/ram0: 4 MiB, 4194304 bytes, 8192 sectors
Units: sectors of 1 * 512 = 512 bytes
Sector size (logical/physical): 512 bytes / 4096 bytes
I/O size (minimum/optimal): 4096 bytes / 4096 bytes


Disk /dev/ram1: 4 MiB, 4194304 bytes, 8192 sectors
Units: sectors of 1 * 512 = 512 bytes
Sector size (logical/physical): 512 bytes / 4096 bytes
I/O size (minimum/optimal): 4096 bytes / 4096 bytes
Which one to choose:
fdiskorparted?
With fdisk, you design your new partition table before making the actual changes to the disk, and it makes changes only when you exit the program. But with the parted, partitions are created, modified, and removed as you issue the command.
Creating a Partition Table
Check and select the device
In my case it is a flash drive and it is mounted as /dev/sdb, once the drive is selected, type p to print the current partition on the flash drive.
1
2
$ lsscsi
$ sudo fdisk /dev/sdb
1
2
3
4
5
6
7
8
9
10
11
12
13
14
15
16
17
18
19
20
21
22
23
# Output
Changes will remain in memory only, until you decide to write them.
Be careful before using the write command.
...
...
...

# print the current table
Command (m for help): p

Disk /dev/sdb: 115.41 GiB, 123924905984 bytes, 242040832 sectors
Disk model: TESLADRIVE
Units: sectors of 1 * 512 = 512 bytes
Sector size (logical/physical): 512 bytes / 512 bytes
I/O size (minimum/optimal): 512 bytes / 512 bytes
Disklabel type: gpt
Disk identifier: B9083D28-1E94-45BC-A8A3-DA68BE09A9A9

Device       Start     End Sectors  Size Type
/dev/sdb1       64     635     572  286K Microsoft basic data
/dev/sdb2      636   17019   16384    8M EFI System
/dev/sdb3    17020 3577255 3560236  1.7G Apple HFS/HFS+
/dev/sdb4  3577256 3577855     600  300K Microsoft basic data
Deleting a partition
Here in my example, I am deleting sdb3 using the command d and printing the output with p.
1
2
3
4
5
6
7
8
9
10
11
12
13
14
15
16
17
18
19
20
# deleting a partition
Command (m for help): d
Partition number (1-4, default 4): 3

Partition 3 has been deleted.

# print the partition again
Command (m for help): p
Disk /dev/sdb: 115.41 GiB, 123924905984 bytes, 242040832 sectors
Disk model: TESLADRIVE
Units: sectors of 1 * 512 = 512 bytes
Sector size (logical/physical): 512 bytes / 512 bytes
I/O size (minimum/optimal): 512 bytes / 512 bytes
Disklabel type: gpt
Disk identifier: B9083D28-1E94-45BC-A8A3-DA68BE09A9A9

Device       Start     End Sectors  Size Type
/dev/sdb1       64     635     572  286K Microsoft basic data
/dev/sdb2      636   17019   16384    8M EFI System
/dev/sdb4  3577256 3577855     600  300K Microsoft basic data
Creating a new partition
We can use n command to create a new partition. As seen in the below example, it will prompt you for the sector to choose, lets say you want to create multiple partition, one of them is 200MB then you will enter the first sector (default) and in the next line add +200M.
But in my case, I am creating a partition on the remaining entire sectors. SO I will just hit enter twice.
1
2
3
4
5
6
Command (m for help): n
Partition number (3,5-176, default 3): 3
First sector (17020-242040786, default 3577856):
Last sector, +/-sectors or +/-size{K,M,G,T,P} (3577856-242040786, default 242038783):

Created a new partition 3 of type 'Linux filesystem' and of size 113.7 GiB.
Now if I check all the partitions available, I get the following result
1
2
3
4
5
6
7
8
9
10
11
12
13
14
15
16
17
18
Command (m for help): p
Disk /dev/sdb: 115.41 GiB, 123924905984 bytes, 242040832 sectors
Disk model: TESLADRIVE
Units: sectors of 1 * 512 = 512 bytes
Sector size (logical/physical): 512 bytes / 512 bytes
I/O size (minimum/optimal): 512 bytes / 512 bytes
Disklabel type: gpt
Disk identifier: B9083D28-1E94-45BC-A8A3-DA68BE09A9A9

Device       Start       End   Sectors   Size Type
/dev/sdb1       64       635       572   286K Microsoft basic data
/dev/sdb2      636     17019     16384     8M EFI System
/dev/sdb3  3577856 242038783 238460928 113.7G Linux filesystem
/dev/sdb4  3577256   3577855       600   300K Microsoft basic data

Partition table entries are not in disk order.

Command (m for help):
In the above output, at the end it says, the partition table entries are not in the disk order. sdb4’s last sector is 3577855 and sdb3’s first sector is 3577856 which makes sense. It is a poor way to create partition and difficult to maintain.
Saving the changes
1
2
3
4
5
6
7
Command (m for help): w
The partition table has been altered.
Failed to remove partition 3 from system: No such device or address

The kernel still uses the old partitions. The new table will be used at the next reboot.
Syncing disks.
Cleanest modern approach:
Use gdisk instead of fdisk for GPT disks — it has better tools for reordering/optimizing.
1
sudo gdisk /dev/sdb
Then inside gdisk:
1
2
3
* s → sort partitions (reorders entries to match disk order)
* p → verify
* w → write
gdisk’s sort function often fixes this automatically without deleting anything.
File System
I have gone in depth about the file system in my post Head First Dive Into File System. So in this section, I will touch on the subject of creating, mounting and remounting of the file system.
Creating a Filesystem
1
2
3
sudo mkfs.<filesystem-type> [options] /dev/sdXn
# or the generic form (less common now):
sudo mkfs -t <filesystem-type> [options] /dev/sdXn
Example
1
2
3
4
sudo mkfs.ext4 /dev/sdb3           # Create ext4 filesystem
sudo mkfs.xfs -f /dev/nvme0n1p2    # Create XFS (force with -f if needed)
sudo mkfs.vfat -F 32 /dev/sdc1     # Create FAT32 for USB drive
sudo mkfs.btrfs -L mypool /dev/sdd # Create Btrfs with label "mypool"
Behind the Hood
mkfs is the front end, it is a symlink to a series of file creation utilities in ‘sbin.
1
$ ls -l /sbin/mkfs.*
1
2
3
4
5
6
7
8
9
10
11
# Output
-rwxr-xr-x 1 root root 22912 Sep 15 20:08 /sbin/mkfs.bfs
-rwxr-xr-x 1 root root 35144 Sep 15 20:08 /sbin/mkfs.cramfs
lrwxrwxrwx 1 root root     6 Apr 28  2024 /sbin/mkfs.ext2 -> mke2fs
lrwxrwxrwx 1 root root     6 Apr 28  2024 /sbin/mkfs.ext3 -> mke2fs
lrwxrwxrwx 1 root root     6 Apr 28  2024 /sbin/mkfs.ext4 -> mke2fs
-rwxr-xr-x 1 root root 52048 Mar 31  2024 /sbin/mkfs.fat
-rwxr-xr-x 1 root root 43408 Sep 15 20:08 /sbin/mkfs.minix
lrwxrwxrwx 1 root root     8 Mar 31  2024 /sbin/mkfs.msdos -> mkfs.fat
lrwxrwxrwx 1 root root     6 Apr  8  2024 /sbin/mkfs.ntfs -> mkntfs
lrwxrwxrwx 1 root root     8 Mar 31  2024 /sbin/mkfs.vfat -> mkfs.fat
Mounting a FileSystem
In Unix, the process of attaching a filesystem to a running system is called mounting.
1
2
3
$ mount
# OR
$ findmnt
1
2
3
4
5
6
7
8
# Output
/dev/sdd on / type ext4 (rw,relatime,discard,errors=remount-ro,data=ordered)
none on /mnt/wslg type tmpfs (rw,relatime)
sysfs on /sys type sysfs (rw,nosuid,nodev,noexec,noatime)
proc on /proc type proc (rw,nosuid,nodev,noexec,noatime)
devpts on /dev/pts type devpts (rw,nosuid,noexec,noatime,gid=5,mode=620,ptmxmode=000)
binfmt_misc on /proc/sys/fs/binfmt_misc type binfmt_misc (rw,relatime)
...
If we look at the above output, we see a general format:
1
2
device_or_source on mount_point type filesystem_type (options)
# options are the comma seperated mount flags
Also, other than sda,sdb, we see sysfs, none, proc etc, what does it mean?
none: no real device blocksysfs on /sys: virtual filesystem exposing kernel device/driver infoproc on /proc: Virtual FS for process info, kernal parameters, statstmpfs: RAM-based filesystems
How to mount
1
2
3
4
$ mount -t type device mountpoint

# Example :
$ mount -t ext4 /dev/sdf2/ /home/extra
How to unmount
1
$ unmount mountpoint
Filesystem UUID
UUID : Universally Unique Identifier
1
2
 $ blkid # block ID
 $ mount UUID=XXXX-XXXX-XXXX /home/extra
Disk Buffer
In Linux system, the kernel doesn’t ususally immediately write to a device. It caches it to RAM. sync tells the kernel to flush all dirty buffer (modified data in memory) to their respective block device immediately.
1
2
3
4
5
6
# before removing USB
$ sync

$ sync && sudo reboot

$ sync /dev/sdb
The /etc/fstab Filesystem Table
/etc/fstab (often just called fstab) is a plain-text configuration file in Linux that tells the system which filesystems to mount automatically at boot, and how to mount them (options, mount point, etc.).
1
<device>  <mount point>  <filesystem type>  <mount options>  <dump>  <fsck pass>
1
2
# Example
UUID=abcd1234-5678-90ef-ghij-klmnopqrstuv  /home  ext4  defaults,noatime,discard  0  2
File System Capacity
df stands for disk free and shows disk space usage.
1
2
3
$ df
$ df -h # Human-Readable form
$ df -i # Show inode usage
1
2
3
4
5
6
# Example:
Filesystem     1K-blocks      Used Available Use% Mounted on
/dev/sda1      104857600   45236892  54520408  46% /
/dev/sda2      209715200  123456789  86258311  59% /home
tmpfs           4194304     123456   4070848   3% /run
/dev/sdb1       976762584  876543210 100219374  90% /mnt/backup
Checking and Repairing File systems
fsck - file system check
1
2
3
4
5
# Must be unmounted! (or read-only for root in recovery)
sudo fsck /dev/sda1
sudo fsck -f /dev/sda1          # force check even if clean
sudo fsck -y /dev/sda1          # auto-answer "yes" to all fixes (dangerous but convenient)
sudo fsck -C /dev/sda1          # show progress bar
Never run
fsckon a mounted filesystem (except read-only with-n)
1
sudo fsck -n /dev/sda1   # check only, no changes (safe on mounted FS)
Swap Space
Swap is the space in storage device where the operating system creates virtual memory, if it runs out of the real memory.
1
2
3
4
$ free -h
               total        used        free      shared  buff/cache   available
Mem:            15Gi       4.5Gi       2.5Gi       829Mi       9.0Gi        11Gi
Swap:          4.0Gi          0B       4.0Gi
Creating and managing Swap
1
2
3
4
5
sudo fdisk /dev/sda   # create partition type 82 (A dedicated partition (type 82 in fdisk, 8200 in GPT))
sudo mkswap /dev/sdaX
sudo swapon /dev/sdaX
# Add to /etc/fstab:
UUID=abcd-1234  none  swap  sw  0  0
Logical Volume Manager

Logical Volume Manager (LVM) is a flexible storage management system in Linux that sits between physical disks/partitions and filesystems. It allows you to abstract, pool, resize, and manage storage much more dynamically than traditional fixed partitions.
Quick Viewing Commands
| Command | Description |
|---|---|
pvs | physical volumes |
vgs | volume groups |
lvs | logical volumes |
lvdisplay | detailed view |
vgdisplay -v | show free space, etc. |
Example
Imagine I have two devices sdb1 and sdc1, 5GB and 15 GB respectively. How I will create two LVs with 10GB space each?
Step 1: Convert the partitions /dev/sdb1 and /dev/sdc1 into PVs.
1
2
3
4
5
$ sudo pvcreate /dev/sdb1
$ sudo pvcreate /dev/sdc1

# verify
$ sudo pvs
Step 2: Combine the PVs into a single VG named myvg.
1
2
3
4
$ sudo vgcreate myvg /dev/sdb1 /dev/sdc1

# Verify
$ sudo vgs
Step 3: Create two 10GB LVs named lv1 and lv2 from myvg.
1
2
3
4
5
$ sudo lvcreate -L 10G -n lv1 myvg
$ sudo lvcreate -L 10G -n lv2 myvg

# Verify
$ sudo lvs
Step 4: Format each LV as ext4 (creates the “partitions”).
1
2
sudo mkfs.ext4 /dev/myvg/lv1
sudo mkfs.ext4 /dev/myvg/lv2
Step 5: Mount them (optional, for testing):
1
2
3
sudo mkdir /mnt/lv1 /mnt/lv2
sudo mount /dev/myvg/lv1 /mnt/lv1
sudo mount /dev/myvg/lv2 /mnt/lv2
Now lets say, I don’t want the second LV and want to remove it and add that space to first LV.
1
2
3
4
5
6
7
8
9
10
11
12
sudo umount /mnt/lv2 # unmount

sudo lvremove /dev/myvg/lv2 # remove the LV

sudo lvs # confirm removal

sudo lvextend -L +10G /dev/myvg/lv1 # Extend lv1 by 10GB (to 20GB total)

sudo resize2fs /dev/myvg/lv1 # Resize the ext4 filesystem to fill the new space

sudo lvs # verify
df -h /mnt/lv1  # if mounted